Twisting is Magic, but Only if Done Right
Let's break down twisting yoga poses
The spine moves in four ways: forward bending (flexion), backward bending (extension), side bending (lateral flexion) and twisting (rotation). All movements are important for spinal health, but need to be done mindfully and intentionally.
Twisting yoga poses strengthen the obliques (2 of our 4 abdominal muscles) and the spinal muscles, while also stretching these muscles on the opposite sides. Simultaneous stretching and strengthening makes twisting poses pretty economic in that way.
They also make the back feel great! If you’ve been doing a lot of sitting, you might want to play with some of these twisting poses to release the stiffness and back crankiness that sitting creates. If you sit at a desk “for a living,” twisting poses might be the medicine your body is craving.
The basics
All twisting poses, no matter whether you are sitting, standing, or lying down, have a few similarities that are important to keep in mind. Like with any exercise, you want to make sure your form is correct to minimize the chance of injury. If you have severe osteoporosis, painful bulging discs or spinal stenosis, you may want to minimize twisting. If you choose to twist, do so from the strength of your obliques, never push yourself deeper into a twist.
1. Pelvis and ribcage move in opposite directions
There are 2 ways to twist: Keep the pelvis stable and rotate the ribs, or keep the ribs stable and rotate the pelvis. Typically when I teach, I focus on the rib rotation for most poses. When the pelvis rotates it’s easy for the sacroiliac joints (aka SI joints) to slide and, depending on your body, they don’t always slide back, which can lead to pain.
Focusing on keeping the pelvis stable and moving the ribs is a safer way to twist that doesn’t put pressure on the pelvis in the same way. You can focus on the oblique action, without forcing the pose.
2. Never force the twist
Twisting should always come from the obliques and never from the force of an arm or other body part. There are many twisting poses where and arm or an elbow braces against a leg, but the majority of the twist should come from the core. If you have any lower back issues to begin with, always be gentle with yourself and do less. The more you breathe, the more you can relax into the twist. Never push yourself to do more, as this often ends in injury.
3. Breath is your friend
Relaxation is a natural, physiological response to the exhale. The deeper you inhale, the longer you can exhale and the more time you have to relax into the pose. Letting go of resistance is the way to move deeper into a pose, and twisting is no different. The more you release tension in your torso, the easier it is to find the rotation. Of course there will be an end point, but your breath should be your guide as to how much rotation you should do.
As long as you can breathe deeply and comfortably, your body is fine. If you are bumping up against the edge of resistance, stay where you are until the resistance lessens.
Twisting poses to play with
I’ve had a love/hate relationship with twisting poses for as long as I’ve been practicing yoga. Some days I struggle with them, other days I crave them and can’t get enough. It really depends on the day and how I feel. Thankfully, I usually have more “love” days and that’s because twisting poses feel good for my spine.
When I was younger I used to get all sorts of snap*crackle*pops every time I twisted, but that’s not really the case anymore. If your spine is “crunchy/noisy” that’s completely fine unless the crunches cause pain. As is the rule generally, if there is pain, stop. If you are unclear as to what different sensations in your body mean, check out this previous post.
Have You Ever Wondered What it Means to "Listen to Your Body?"
The body speaks to you all day long, are you listening? What does it mean to “listen” to your body? Your mouth might speak words to communicate to other humans, but the body speaks to us in the language of sensation.
Here are three twisting poses to play with, one standing, one seated, and one lying down. Have a couple of yoga blocks handy, props are your friends.
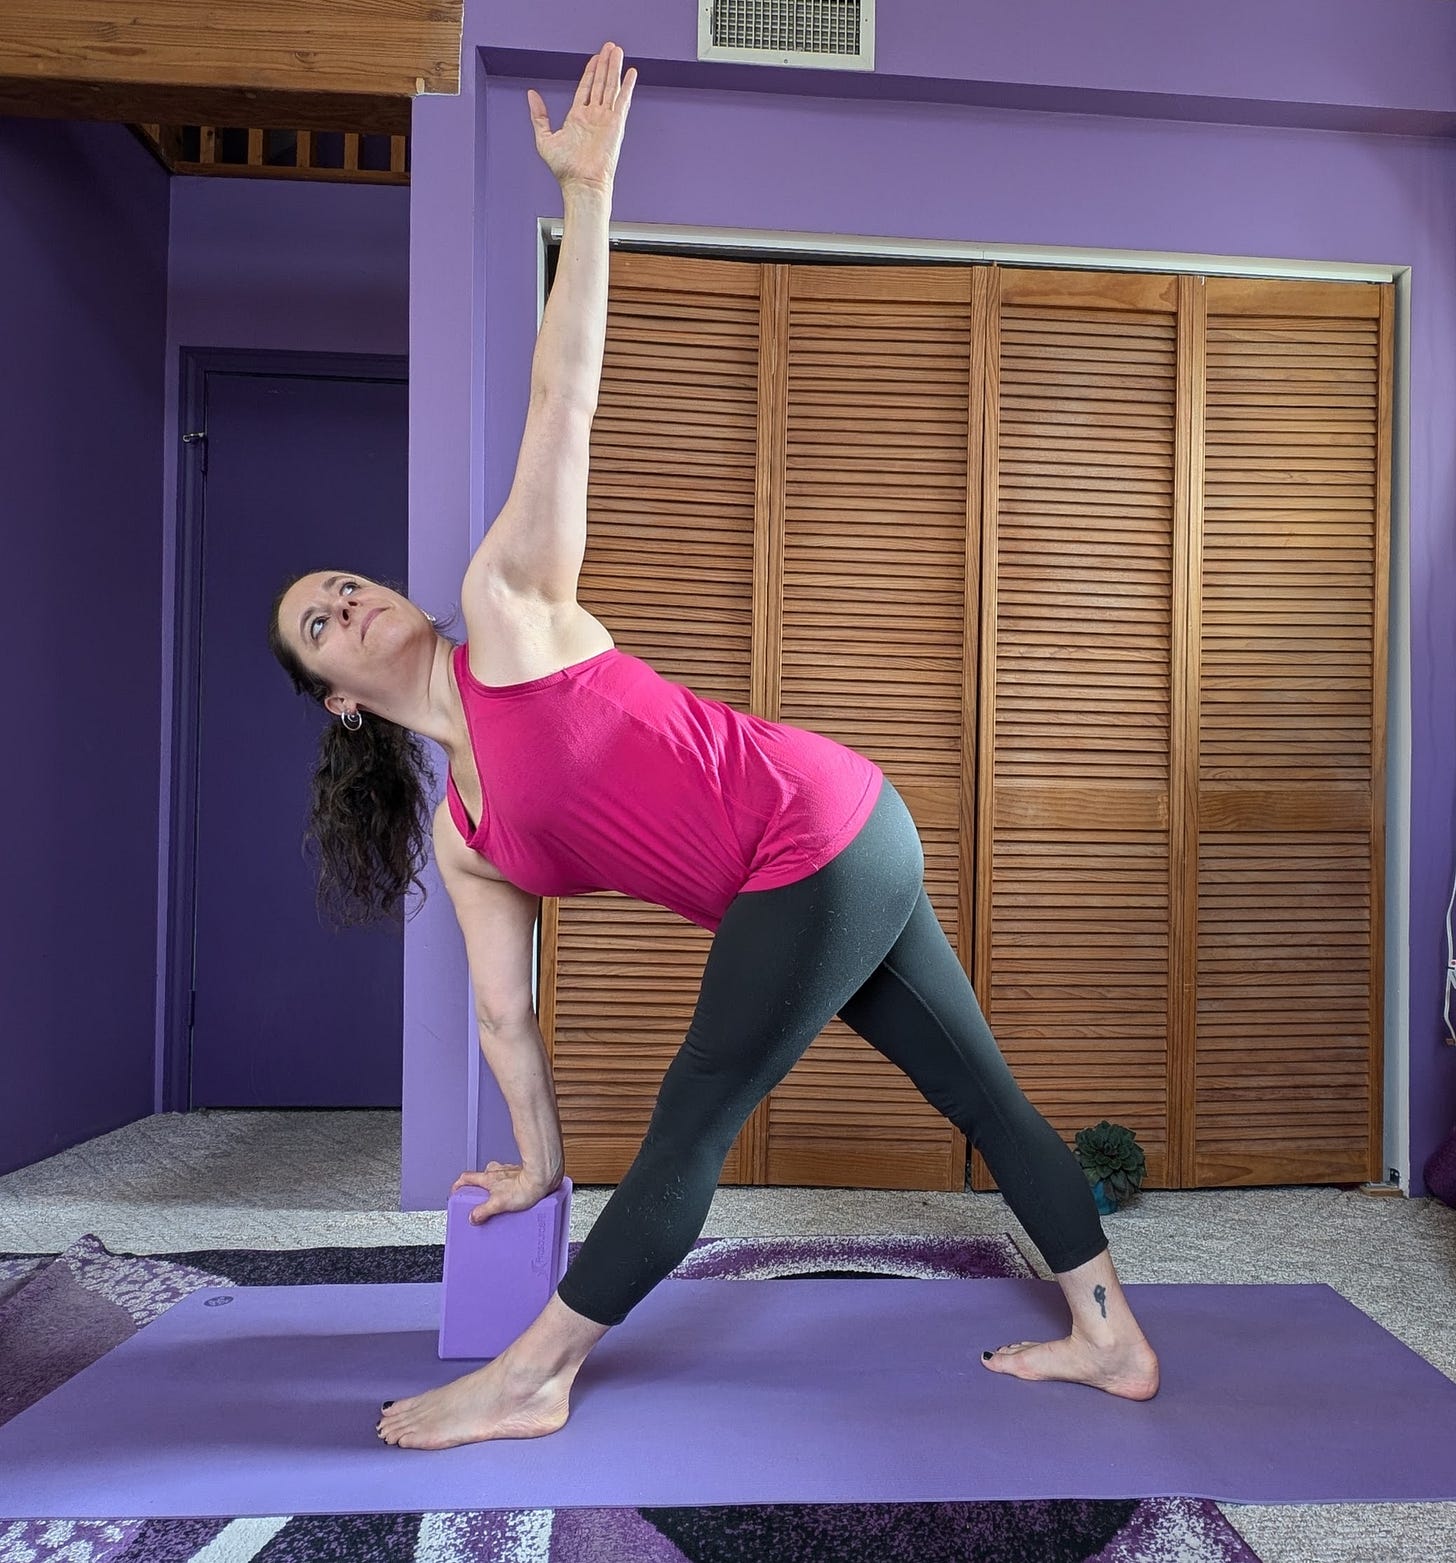
Standing: Revolved Triangle pose/ Parivrtta Trikonasana
Start standing with your right foot facing the front of your mat and your left foot about 2.5-3 feet behind it facing to the left about 45 degrees. Line up your heels in a straight line. Place a block to the left of your right foot and hinge forward with a flat back, placing your left hand on the block. Your hips should both face the floor and there should be equal weight on both feet.
Keeping your pelvis level, reach your right arm to the right, parallel to the floor. Inhale a breath. As you exhale, rotate your ribs to the right, letting the arm come along for the ride (don’t lead with your hand). The arm may or may not aim upward toward the ceiling, it might be on a diagonal between the wall and the ceiling.
Press the ball of the right big toe and the outer left foot into the floor equally. That will help you engage the quads and inner thighs. Reach your sitbones toward the wall behind you and lengthen the top of the head toward the wall in front of you. Hold and breathe 3-8 breaths, then repeat to the other side.
Watch this short video on Revolved Triangle Pose.
Sitting: Half Seated Spinal Twist, aka Half Lord of the Fishes/ Ardha Matsyendrasana
This is one of my favorite seated twists, and can be done with the bottom leg either bent or straight. Straight is easier with tight hips, but harder with tight hamstrings. If your hamstrings are tight and sitting with a vertical spine isn’t possible, sit on a folded blanket or yoga block.
Sit with either your left leg extended in front of you or your left knee bent, the knee on the floor and the foot by your right hip. Place your right foot on the floor to the left of your left knee. Make sure that both sit bones are on the floor. If you can’t get your right one down, straighten your left leg.
As you inhale, lengthen your spine upward so that both your pelvis and spine are vertical. As you exhale rotate the ribs to the right. Wrap your left arm around your right knee, hugging it toward your chest, your right hand can be on the floor behind you for support. Think about aiming your left ribs toward your right inner thigh.
Deepening the twist should come from your core muscles, not the pull of your left arm. The arm creates a little hip stretch for the right hip, but the twist happens from the exhale. Gaze gently over your right shoulder. Hold 3-8 breaths then repeat on the other side.

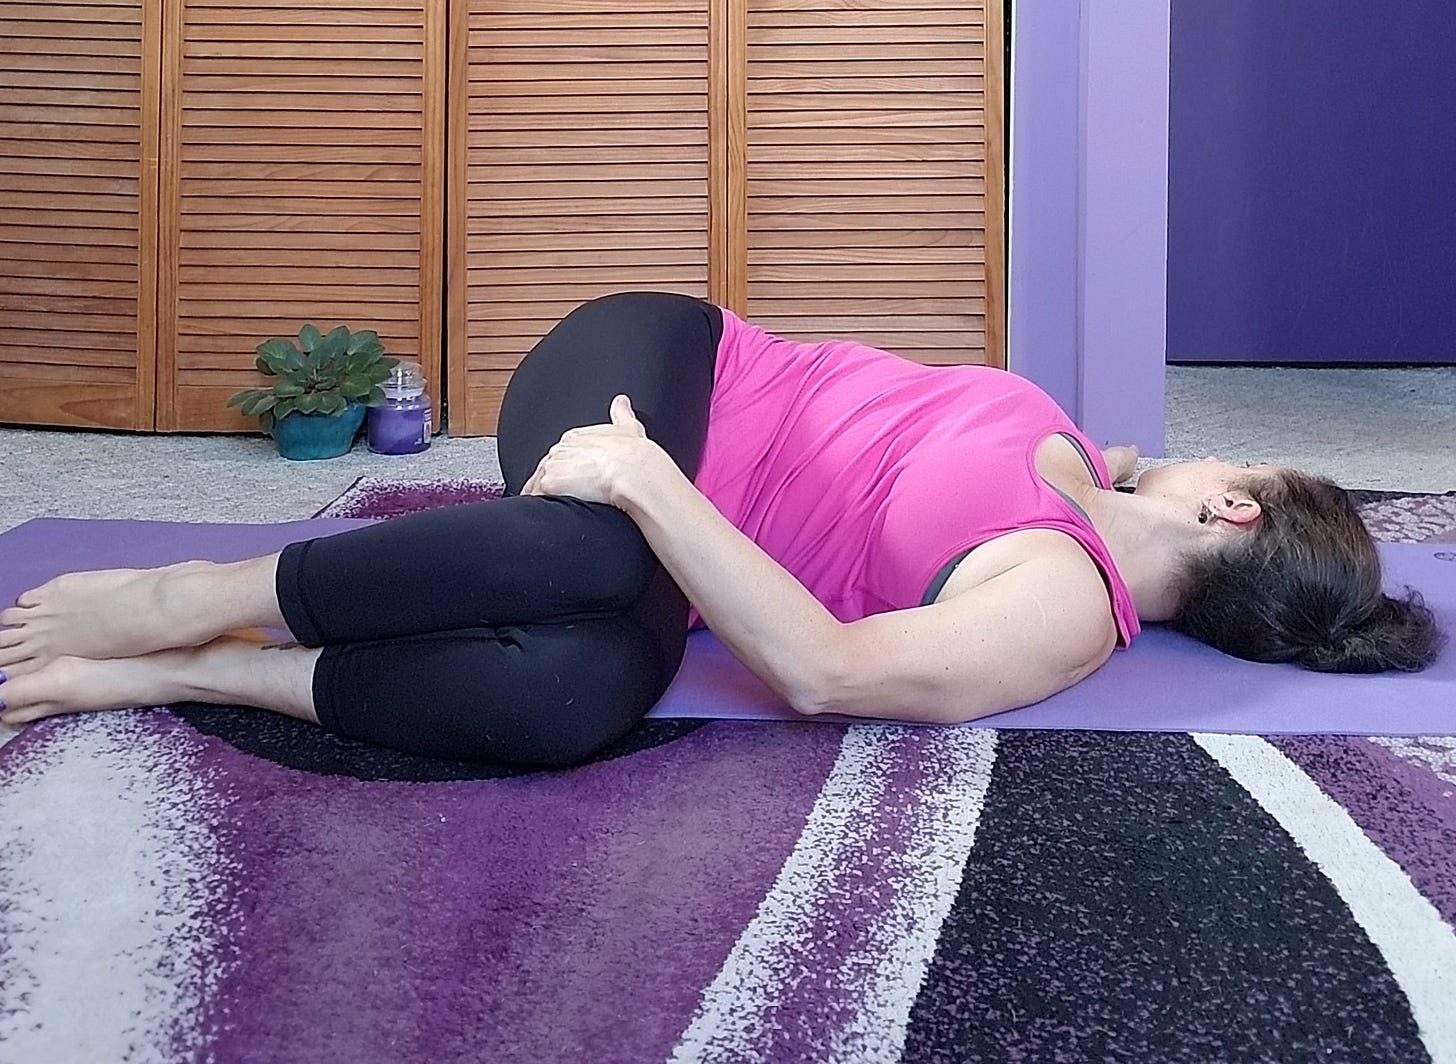
Reclining: Reclining Twist/ Jathara Parivartanasana
This pose can be held as a static pose, or you can rock and roll from one side to the other. Both feel fabulous on your spine and hips. If you find that your top hip feels strained, place a block between your knees. If your shoulder is off the floor with your arm dangling, place a block under your upper arm. The more support you give yourself, the easier it is to relax into the pose.
Lie down on your back with your knees toward your chest. Roll onto your left side, keeping your knees toward your chest. Inhale a breath. As you exhale, move your right ribs to the right, keeping your pelvis perpendicular to the floor. Don’t let your right hip fall back, you want your right hip directly over your left hip. This is where SI joint frequently occurs. Keeping your pelvis still will help.
Allow your right arm to open to the right, palm facing the ceiling. The arm should be between 9-10 o’clock if your head is at 12. Reach your right hip forward toward the front of your mat while relaxing your right ribs to the right. Your left hand can rest on your right leg.
Breathe as deeply and fully as possible. Exhale to relax into the twist. Gravity is your friend in the pose, surrender to gravity. Stay 3-8 breaths then repeat to the other side.
Do you practice twists? Which one is your favorite? Have you tried twisting while balancing on one leg, like with Tree pose or Revolved Half Moon? What is your challenge when it comes to twisting? Share in the comments!
Do you have specific poses or yoga concepts you’d like me to cover in a future post? I take requests! Feel free to reach out in the chat!
Join me December 9-20, online on the mat!
Don’t wait for New Year’s to reconnect to your yoga practice and yourself. End of Year Yoga Launch offers 8 15-minute classes (plus 2 bonus Movement and Meditation classes) to help you keep moving while calming your nerves when the holiday season gets crazy. These classes can be taken live online, or on demand when it suits your schedule. Included for Purple Room Yoga class subscribers or just $15 for all 10 classes! Click the button below for more details or to sign up!


I love all the twist poses!
"Gravity is your friend in the pose, surrender to gravity." -- So true and well said!