


Ask a Yoga Teacher: Modifications for Osteoporosis

When you get diagnosed with osteoporosis or osteopenia it can be scary. Suddenly you feel like your skeleton is disintegrating from inside you. While you’ll need to modify your yoga practice, you don’t need to give it up completely. In fact, yoga can strengthen your muscles, therefore your bones, while also working on balance, which is key to preventing falls.
Yoga uses your body weight to create strength, thereby being weight bearing exercise. Actively engaging your muscles while you practice will enhance this quality even more.
Here are a few things to keep in mind while you practice to ensure your safety:
1. Be cautious with twisting poses
Twists are wonderful for the spine, strengthen the oblique muscles, and are a movement that we do in daily life, like when you look over your shoulder while driving. When you have osteoporosis, you want to make sure that when you twist, you create the movement from the obliques, not by pushing with your arms.
Poses like Revolved Low Lunge/Parivrtta Anjaneyasana or Half Seated Spinal Twist/Ardha Matsyendrasana involve spinal rotation with an assist from your arms. However, creating the full movement from your arms not only puts you at risk for injury (even without osteoporosis), but you are missing out on the strengthening benefits of the pose.
Use your exhale to rotate the spine. Using your core muscles to rotate the spine will give you all the benefits of twisting without force. Also be sure to rotate the ribs while they are perpendicular to the spine. Avoid rounding the spine or side bending while twisting.

More on twisting poses:
Twisting is Magic, but Only if Done Right

The spine moves in four ways: forward bending (flexion), backward bending (extension), side bending (lateral flexion) and twisting (rotation). All movements are important for spinal health, but need to be done mindfully and intentionally.
2. Do a hip hinge rather than spinal flexion
Spinal flexion is when you round the spine. In a pose like Cat pose, spinal flexion is safe because it isn’t weight bearing on the spine, since your hands are on the floor supporting you. Also you activate your abdominal muscles to create the movement. However, this is not the same with other forward bending poses.
Poses like Standing Forward Bend/Utanasana and Bound Angle pose/Baddha Konasana do not typically have the same support with the arms, although they can. The benefits of these pose comes from the hip hinge, where you tip forward from the pelvis. If you can support yourself with your hands, either on the floor or blocks, these poses are safe to do, as long as you keep your spine straight.

Any forward bend, whether you have osteoporosis or not, should initiate from the pelvis. If you are simply reaching with your head, you will not get the stretch you seek. Tipping forward from the pelvis stretches the backs of the legs and/or hips (depending on the pose) and that’s what you are aiming for anyway. Letting the spine round is simply icing on the cake, that you don’t necessarily need to benefit from the pose.
More on forward bending:
Ask a Yoga Teacher: Fearless Forward Bending without Breaking

Welcome to Ask a Yoga Teacher, my monthly post about a particular pose that you are struggling with. This month, since I didn’t get any specific requests, I decided to talk about forward bending poses as a category. If you have a question about a specific pose, please ask in the comments below!
3. Don’t force, don’t fight
This really applies to everyone, but when you are practicing yoga, no matter what pose you are in, don’t force the pose. Practicing shouldn’t involve struggle or strain. You should be able to breathe smoothly and easily through the nose. You should use enough effort to create the pose, activating/stretching the appropriate muscles, but you also need to find ease.
You also don’t want to fight yourself or the pose you are in. Related to finding ease, if you find your body shaking, back off and reset. “No pain, no gain” is not part of the yoga practice and will only leave you injured. Each pose should be a “steady, comfortable seat”1 even if you are standing.
More on the balance between strength and ease:
When You Feel the Beautiful Balance between Strength and Ease

Thank you for joining this journey through the Yamas and Niyamas, the first 2 limbs of yoga. Please consider subscribing to Yoga Living 50 and Beyond. I write about practicing yoga when you are over 50, both on and off the mat. I am so grateful you are here!
3 yoga poses for Osteoporosis
There are many yoga poses that will benefit your body if you have osteoporosis, here are 3 of my favorites: Tree pose/Vrksasana, Warrior 2/Virabhadrasana 2, and Locust pose/Salabhasana. All of these poses are strengthening poses, for both the legs and spine (and core) and will support you off the mat and in your life.
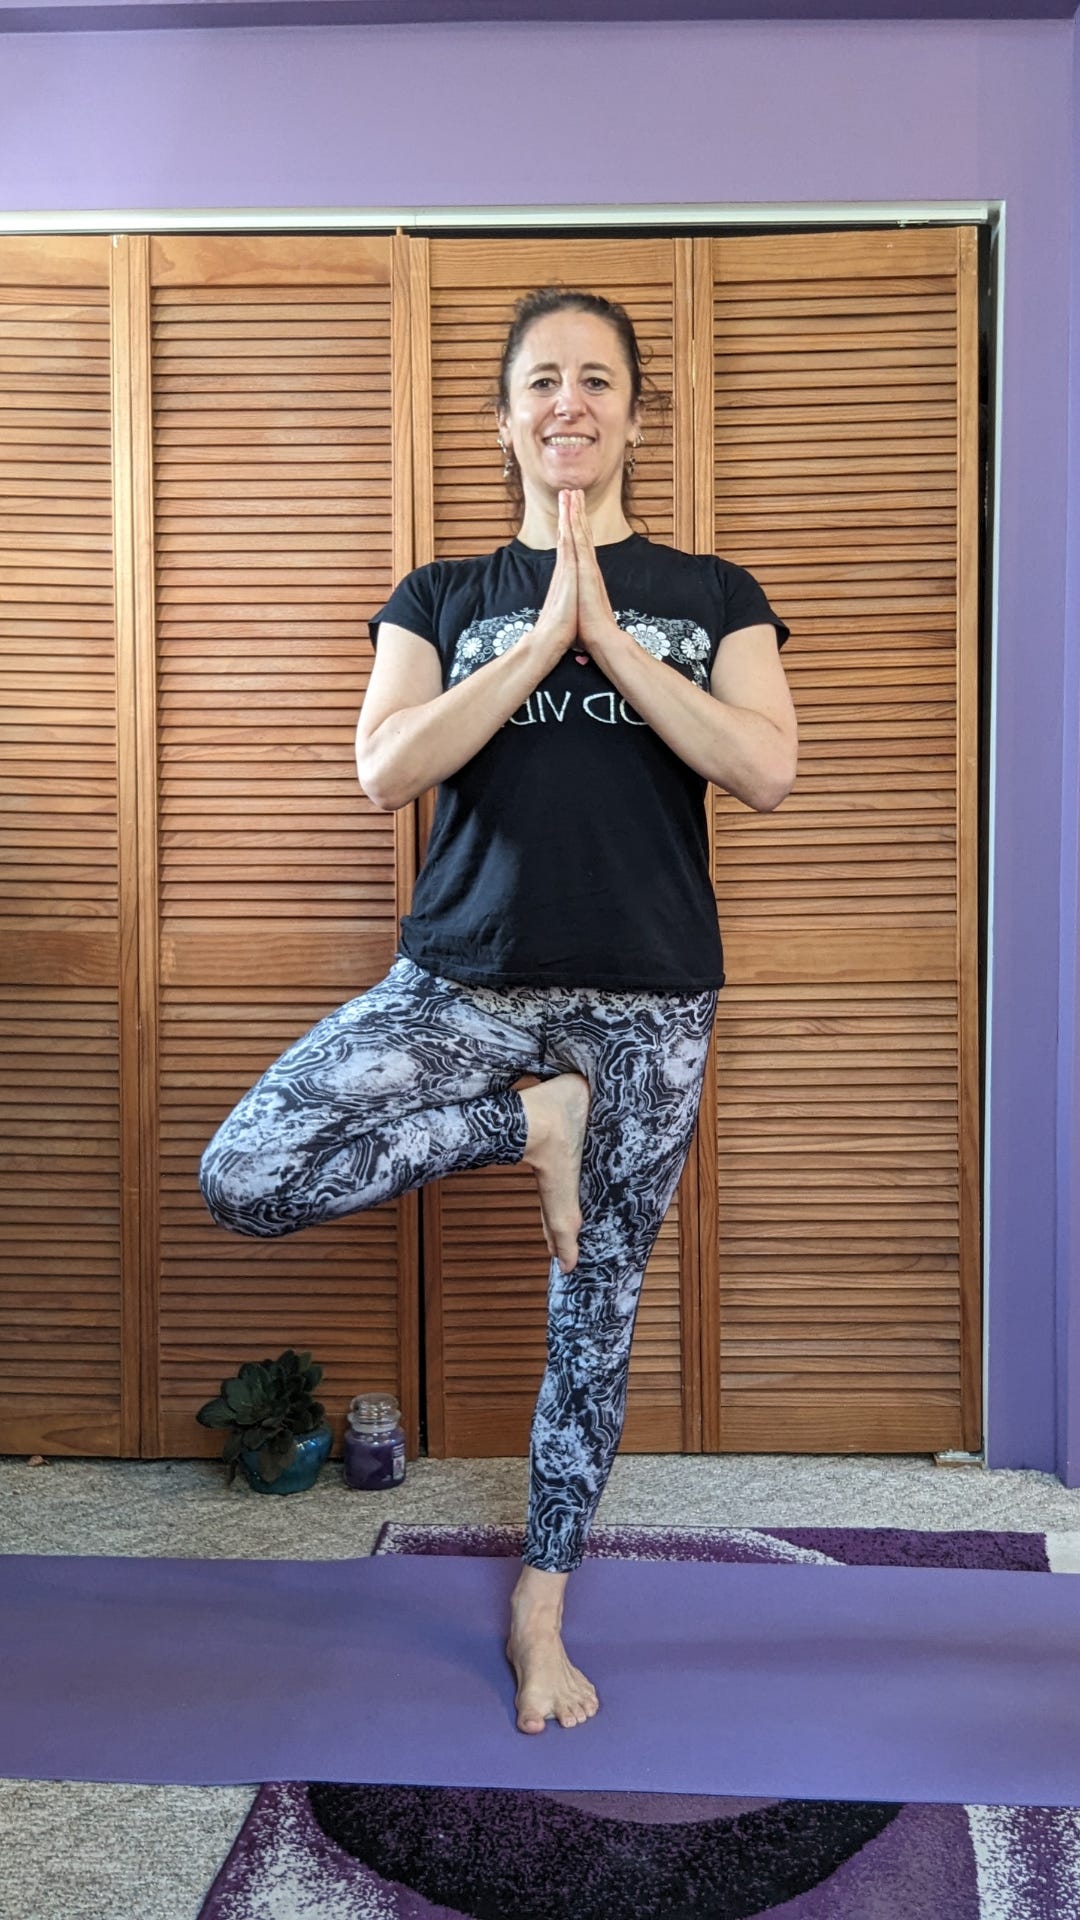
Tree pose/Vrksasana
One of the benefits of Tree pose when it comes to osteoporosis, is that it is a strengthening pose that also cultivates balance. While you don’t go around standing on one leg in your daily life (unless you are me), you do have moments when you are on one foot before transferring your weight to the other foot. Walking, running, getting out of a car, and going up and down stairs are all times when you transfer weight. It’s essential to be able to plant your foot on the floor and know that it’s going to hold you up.
I wrote about Tree pose in multiple posts, but here is one that talks about balance in general. Even if you have “terrible balance,” you are capable of finding stability on your feet, it just takes a little practice. This post also refers to the other Tree pose posts:
Moving From Two Feet To One: Building Balance

**To get the most out of this post, please click all the links that I reference. There’s a lot of detail that I hope will support your yoga practice and your understanding of these poses in your body.**
Warrior 2 pose/Virabhadrasana 2
This is a fabulous pose to strengthen the legs, shoulders, and core. For a standing pose, it really uses all of your muscles. Also, even though you do have 2 feet on the floor, it does require some balance as your feet are lined up one in front of the other.
Stand with your feet a leg length apart and parallel. Rotate your right foot 90 degrees to the right and aim your right knee toward your 2nd and 3rd right toes. Turn your left foot to the right about 5 degrees, while pressing the outer edge of your foot firmly into the floor. Bend your right knee so that it is over your right ankle. Move your thigh toward being parallel to the floor; whether it gets there or not doesn’t matter. Feel your glutes and quad engage, especially in your left leg.
You will notice that your hips are not flat to the side. Let that be okay. It’s more important for the knee to be over the ankle. Your chest, however, can be flat to the side. Press your shoulder blades downward (depression) and apart (protraction) and extend your right arm in the direction of your right leg, and your left arm in the direction of your left leg. Your arms should be parallel to the floor, level with your shoulders, not level with your eyes. Gaze at your right 3rd finger.
Feel your rib cage lifting up away from your pelvis while moving your pelvis toward the floor. You will feel your abdominal muscles engaging to create this subtle movement. Stay and breathe, then, when you’ve had as much fun as you can have with the right side, switch to the left.

Locust pose/Salabhasana
Locust pose is a strengthening back bending pose that strengthens the spinal muscles and undoes the “candy cane back” that can result from gravity. Keeping spinal muscles strong should be a huge priority for osteoporosis, as your muscles can support your skeleton. This pose is all about resisting gravity.
Lie face down on your mat with your forehead on the floor, your arms alongside your body, palms down. Squeeze your shoulder blades together to lift your shoulders off the floor. Lengthen your spine forward and lift your chest off the floor, keeping your head in line with your spine. Your gaze should be slightly downward. Be sure not to reach your chin forward, lengthen from the top of the head.
Engage your glutes and lift your legs off the floor. Try to get your thighs off the floor, this may or may not happen, but try anyway. Hold your body off the floor and breathe in and out through your nose. Relax your jaw, and maybe even smile to yourself. Smiling makes it easier, or at least less effortful. Hold 3-8 breaths, then relax and let your head turn to one side. Repeat one more time, afterward, turning your head the other way.

Do you have any yoga related questions? Ask a Yoga Teacher comes out on the first Saturday of each month. If you struggle with any specific poses or types of poses, please ask and I will try to answer your questions! Leave your questions in the comments!
From Patanjali’s Yoga Sutras, 2.46: “Sthira Sukham Asanam,” or your asanas (poses) should be steady and comfortable.
Great article, Janine! These are important modifications for those dealing with osteoporosis. Thank you for the reminder that modifications allow you to continue practicing.